"My Studio" Account Management Guide
How do I view my list of teachers? How do I add or remove a teacher?

Written by Hayley Barnes
Updated at November 12th, 2021
Where do I find the "My Studio" section?
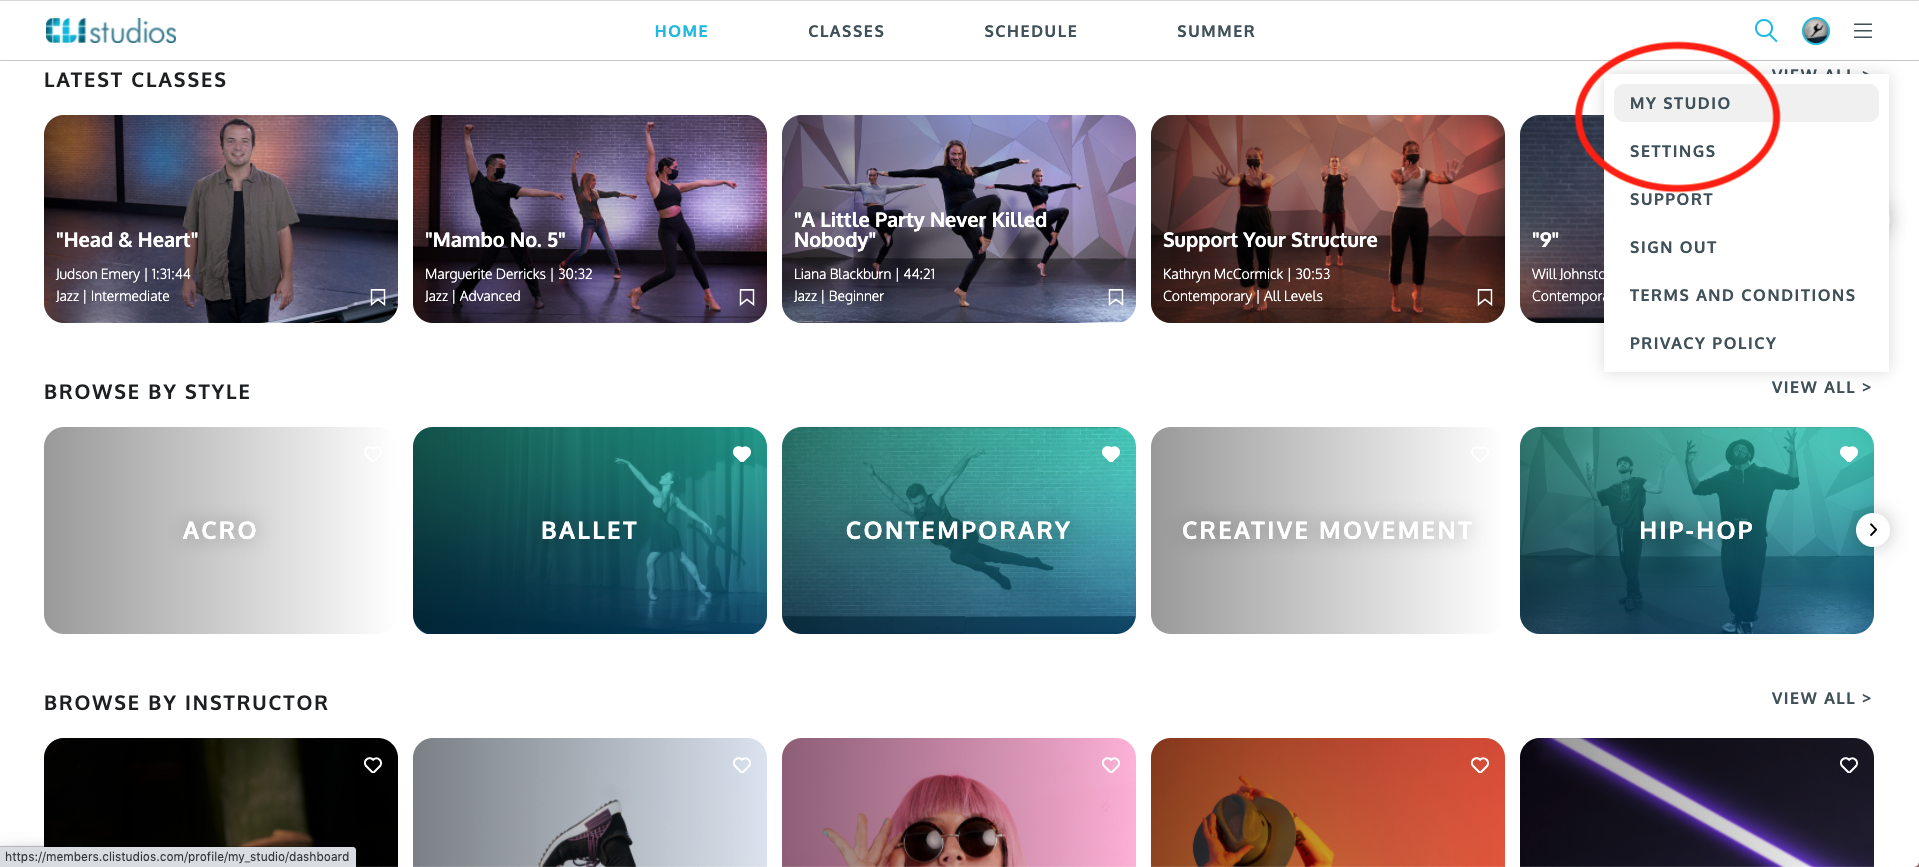
1. Log in to your CLI Studios account through a computer.2. Click on the hamburger menu (the 3 horizontal lines) in the upper right hand corner and select "My Studio" from the dropdown menu.
3. Select the "My Teachers" tab at the top of the page.
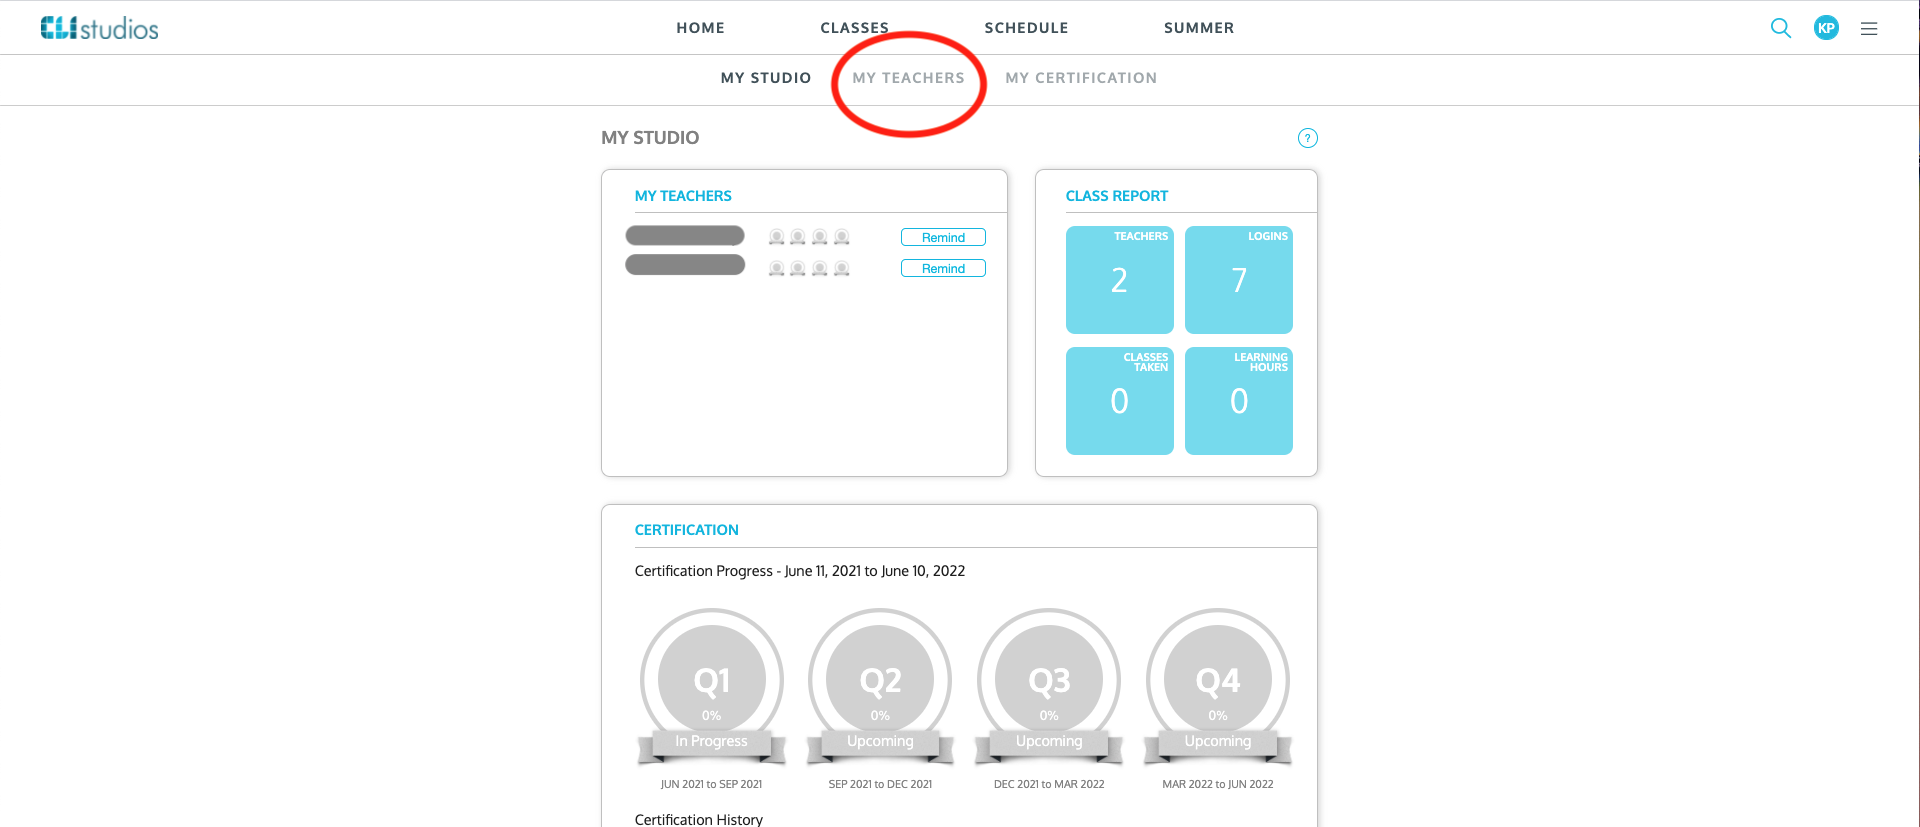
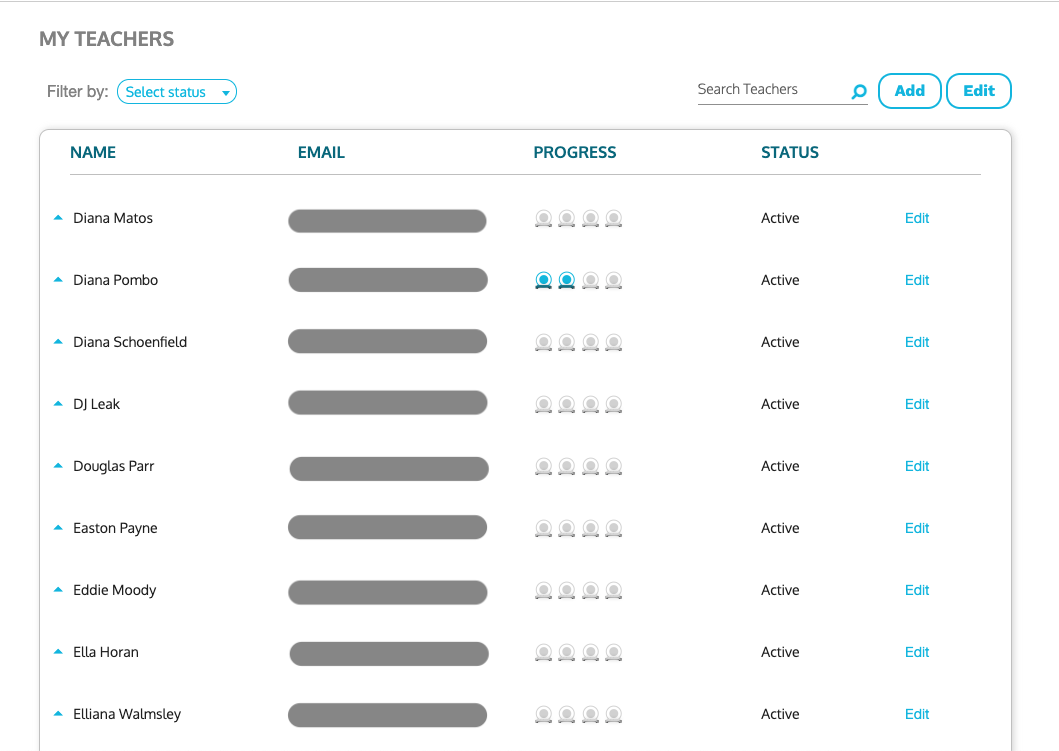
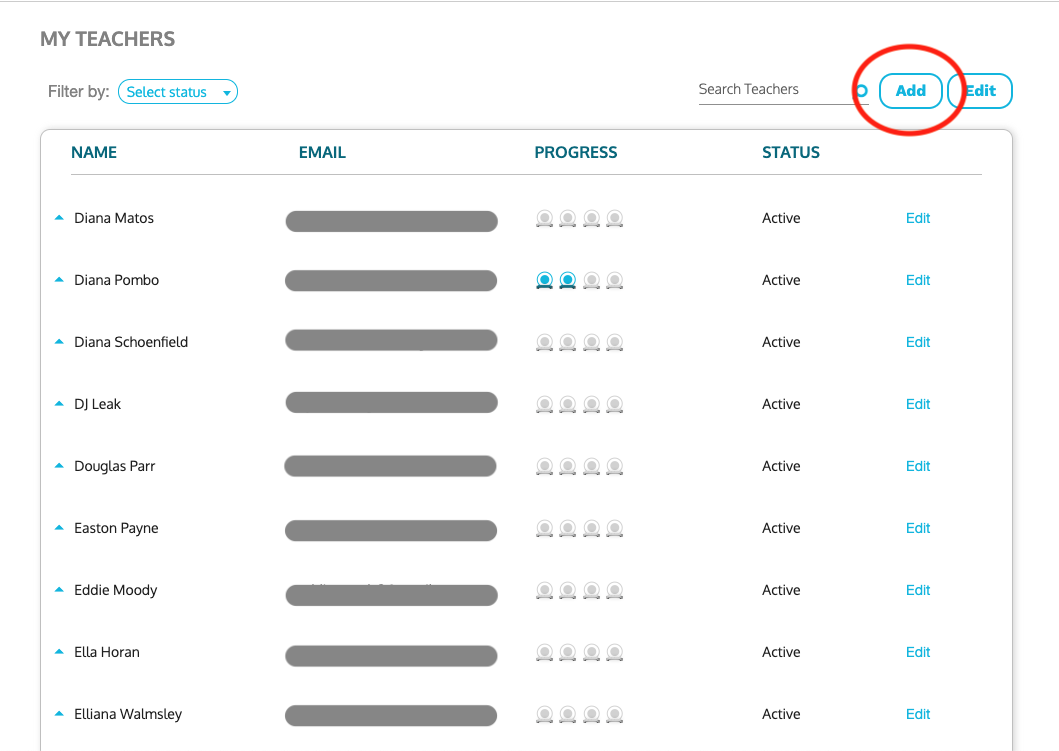
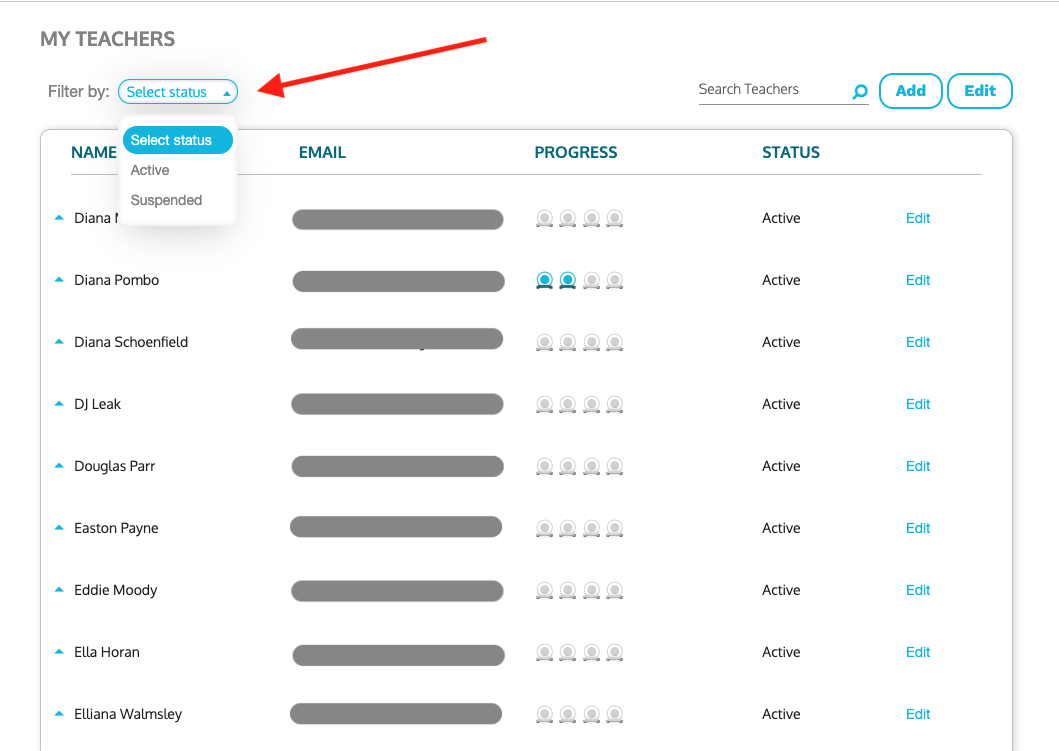
4. This page allows you to view all teachers connected to your account, along with their email address, certification progress, and account status.
Adding New Teacher Accounts
1. Click the "Add" button above your list of teachers.
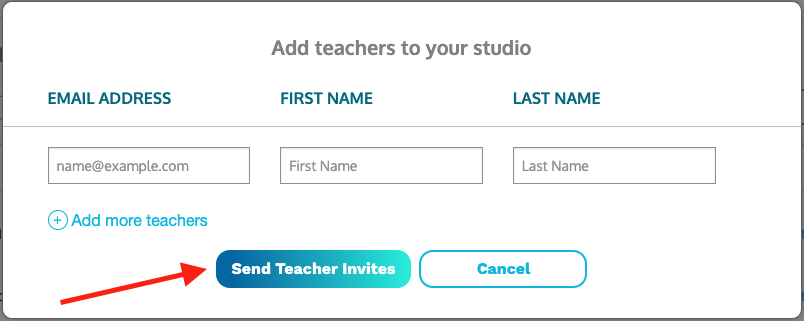
2. Input the email address and name of each teacher that you want to add. Please be sure to input the email address correctly, as it cannot be changed once the invite has been sent.
3. Once you have entered all of the teachers' names, click "Send Teacher Invites". You will then see the teachers' names appear in your list and their account status will be "Pending".
4. Once your teachers receive the email invitation they will click the "Complete Your Registration" button and they will be prompted to enter their date of birth and create a password.
5. When they have successfully completed their registration, your teachers' account status will automatically change to "Active".
Suspending and Reactivating Teachers' Access
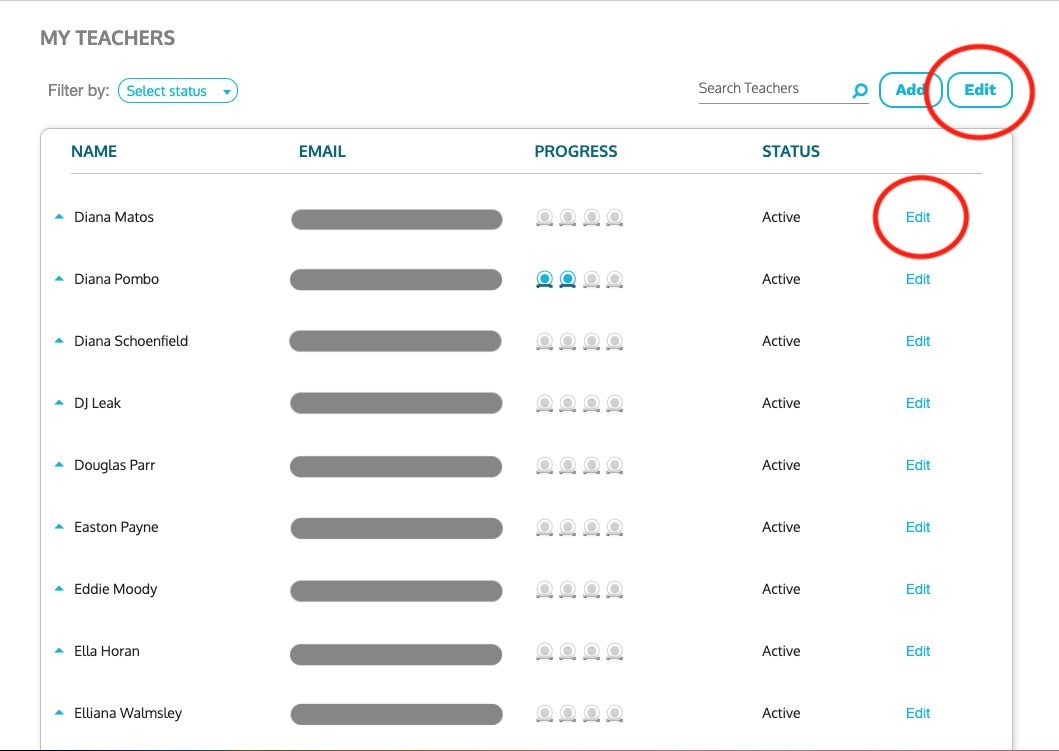
1. Find the teacher's name and select the "Edit" button next to their account status, or if you would like to edit several accounts at a time, select the "Edit" button at the top right corner of the screen.
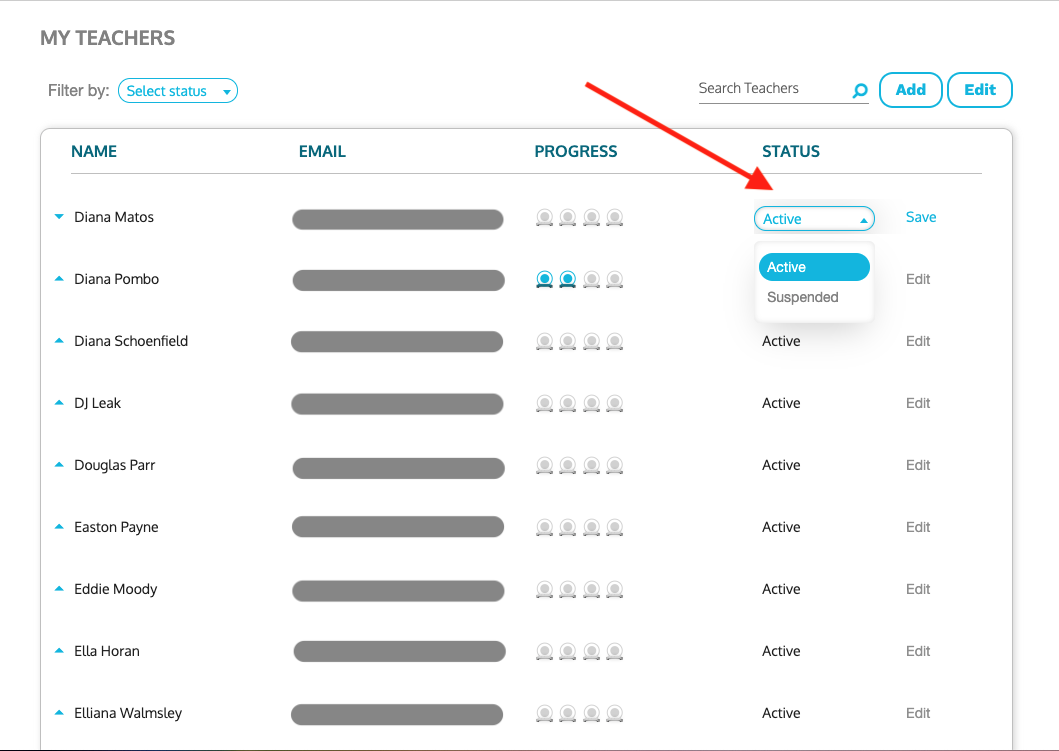
2. Click the dropdown arrow in the "Status" column and select "Suspended" from the dropdown list.
3. Once you click the "Save" button the teachers' status will appear as "Suspended". Once this is done, if the teacher attempts to log in they will receive a message that their account has been cancelled.
4. To reactivate a suspended teacher's account simply switch their status from "Suspended" back to "Active".
NOTE: When viewing your list of teachers you can filter by the account status.
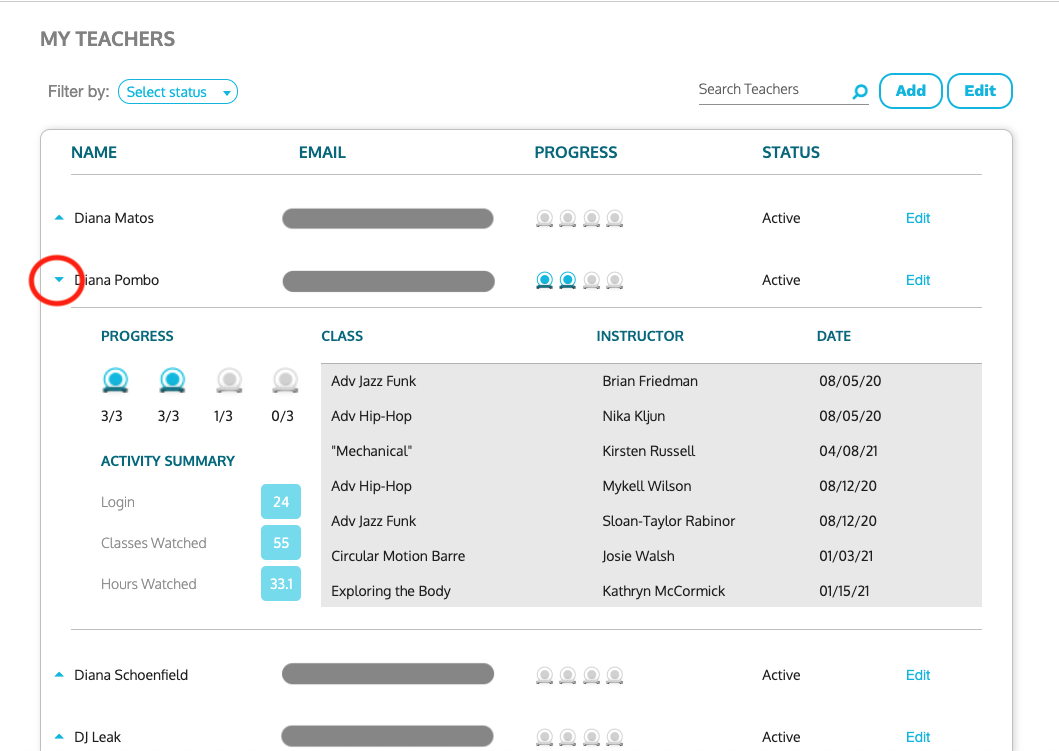
Tracking Your Teachers' Activity
1. Select a teacher from your list and click the blue arrow to the left of their name to view their activity details.